torsdag 9 juni 2011

Korg NanoKontrol mod

0 kommentarer
I bought a Korg NanoKontrol cheap to control softsynths and Cubase, it's a
great little thing but the graphic design is not to my liking.
So I thought I could mod it a little : )


Before : /


Started by taking it all apart


Then I removed all the paint with sandpaper and spray painted it white


I don't need the transport buttons, I use a Contour Shuttle for that.
I used a dremel to cut out a rectangle from a sheet of aluminium, brushed it up with sandpaper
and spray painted it white and black.
I then glued it over the cut outs for the transport buttons.
I haven't decided yet if I should get new slider caps and pot knobs.

I'm quite happy with the result! : )


Much better! : )

onsdag 8 juni 2011

Shruti-1 white mod

0 kommentarer
Got an interesting synth for my birthday, the Shruti-1 from Mutable Instruments.
(I have really good friends : )
My only mod (so far) is a white paint job of the acrylic glass.
I have it permanently hooked up to my studio setup and control it via NanoKontrol
Here are some pics of how I put it together:


Le start.


Resistor hell.

Progress.


Two boards.


And merged.
The paint job.

And done. It sounds fantastic!

måndag 7 mars 2011

Modding the Philips EL6425 - etching brass

0 kommentarer
Time to etch the brass I cut yesterday.
Started by transferring a print to the brass.


It's important to cover everything you don't want etched.


The etched brass after I put it into a mix of sodium persulfate (natriumpersulfat)
and warm water.


Time to paint : )


After removing the excessive paint.
Polished with brass cleaner.


And here we go, I'm quite happy with the result.


söndag 6 mars 2011

Modding the Philips EL6425 - taking care of the power supply

0 kommentarer
Time to take care of the power supply board. By cutting the chassis, I leave the hazardous parts of the power supply wide open.
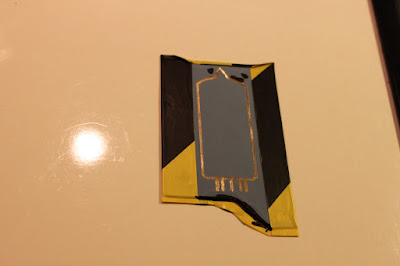
So I want to shield it by putting a brass panel with circuit board material underneath.


Please do not touch..


Cutting the circuit board and the brass with my dremel.
The circuit board will act as an insulate for the brass.


And then put them together.


And some testing to see if it all fits.


And finished! : )
The next step is to etch the brass.


onsdag 2 mars 2011

Modding the Philips EL6425 - taking care of the ugly-as-f**k chassis

0 kommentarer
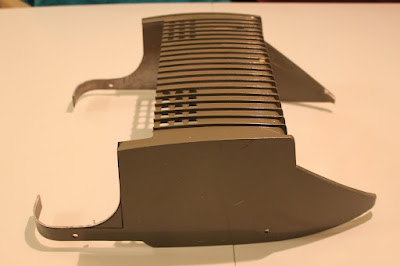
Right.. The chassis really is ugly.
I want to keep the 60's feel and bring the tubes out in the free..
I contacted Johan at Mattssons Smide http://www.mattssonsmide.se and asked him if he could cut the chassis. He pondered the idea for a moment and said, no problem.
He was really helpful and managed to do a really good job of cutting the chassis.
And at a most reasonable price.
Thank you, Johan!

Next step is to paint and lacquer the chassis.


The chassis before cutting:


And after:


Modding the Philips EL6425 - cleaning and painting

0 kommentarer
Time to clean the inside of the beast. Incredible amount of oily dust had to go.
Painted the backside black.


fredag 12 november 2010

Modding the Philips EL6425

0 kommentarer
I recently bought a 1961 tube mixer Philips EL6425.
I thought it looked kind of soviet-industrial and that it could find a place in my studio setup.
Ultimately, my goal is to send audio from my soundcard through the mixer, get some analog colouring, and back into the soundcard again.
The mixer came equipped with some EL36, EF86 Telefunken, RCA and Philips tubes.
Taking off the awful chassis revealed a sturdy, almost bombproof mechanism, just begging to be modded. Or just altered a bit.
I've decided to go for a 1960's hot-rod-smooth-lines-and-heavy-lacquer feeling.

These are the "before" photos:


onsdag 13 januari 2010

The thingamakit super8 synth project

0 kommentarer
I got a thingamakit synth for birthday and it's a wonderful little noise maker.
But I wanted it a little more portable, a little more special.
So I decided I wanted to house the synth in a modded super8 camera.
I searched through loads of websites selling old cameras and by chance I bought a Canon 314 Zoom from Tradera ( a subsidiary to ebay).
It came cheap and fully functional, even a full film inside, I don't know if I dare develop it.

The thingamakit synth is a light controlled synth from Bleeplabs.
It's perfect for sound FX and glitchy noises.

There are some videos of the project here:
http://www.youtube.com/user/1nformat1ka


This is the super8 camera before the modding.
A little worn but fully functional.


Removing the side panel reveals the sturdy 1965 mechanism.
Loads of small screws, springs and thick metal.


Taking it apart, piece by piece...


Started cutting the metal with my dremel.


Gutted.. Saved the lens for the viewfinder so you can still look through it.


Back side, before I turned the battery compartment (right of the viewfinder) to a 6,3 mm audio out.


And after... Drilled a hole to get the audio cable from the battery compartment to the main chamber.


The pots and switches in place.. Drilled holes through the side panel.


And the inside of the side panel. Internal speaker in the bottom left corner.


Installed a 9v battery attached to the former cartridge chamber lid for easy replacement.


As you can see, the thingamakit PCB fits perfectly.
A few nervous seconds worrying it wouldn't..


Connecting the thingamakit synth to the pots, switches, audio out, battery and internal speaker.
A 3,5 mm jack leads to the front of the camera for ledacle attachment.


The attachable ledacle.


Finished : )


Other side.
Noise madness can be obtained with the ledacle attached.
Remove the ledacle for a retro camera feeling, just point the lens at a light source.

/Andreas Narkun